搜索到
2
篇与
的结果
-
 frp和宝塔(Nginx)共用80/443(http,https),真正解决https穿透502问题,支持泛域名穿透 相信能找到这个文章的你也踩了不少坑,网上一些文章基本上都是穿透的80端口,穿透443端口或多或少的都有些问题。大部分小伙伴只一台服务器,并且已经部署过网站,,如果同时使用 frp 服务的话就会存在共享80/443端口的问题,本文将介绍在宝塔配置 nginx 和 frp 共享 80/443 端口和泛域名支持的方法,基本思路通过服务端Nginx(使用的80/443)来配置域名监听并且反向代理到frp所在的http和https端口(frp服务端端口不是 80/443,要改为其它端口如 808/809,本例80用的808,443用的是809),然后frp服务端穿透到frp客户端实现网络访问,本文采用的是tcp转发的方式,没使用frp的 http 和 https 为什么这么干呢,是因为我们要使用80/443二个端口的穿透,而frp只支持单个端口的泛域名转发,具体请看我提的 Issues ,并且frp官方文档上说http和https的实现底层也是tcp。废话不多说直接开始Frp服务端配置[common] # 如果有多个IP,可以选择绑定到不同的ip上 bind_addr = 0.0.0.0 bind_port = 7000 # udp port to help make udp hole to penetrate nat bind_udp_port = 7001 # udp port used for kcp protocol, it can be same with 'bind_port' # if not set, kcp is disabled in frps kcp_bind_port = 7000 # 虚拟主机配置,不能和系统中已监听的端口冲突。http和https可以设置成同一个 #vhost_http_port = 908 #如果采用单端口泛域名转发可以采集此方式 #vhost_https_port = 909 #如果采用单端口泛域名转发可以采集此方式 allow_ports = 808,809 #808为http端口,809为https端口 # 服务端web面板 dashboard_addr = 0.0.0.0 dashboard_port = 7500 # 设置用户名密码,默认都是admin,请注意做修改 dashboard_user = admin dashboard_pwd = 123qwe # 普罗米修斯运维服务,go语言相关监控,可以关闭 enable_prometheus = false # 设置日志文件地址 log_file = /var/log/frps.log # trace, debug, info, warn, error log_level = info log_max_days = 3 # 最新版本支持的验证方式比较多,这里还是选用token模式 # AuthenticationMethod specifies what authentication method to use authenticate frpc with frps. # If "token" is specified - token will be read into login message. authentication_method = token # AuthenticateHeartBeats specifies whether to include authentication token in heartbeats sent to frps. By default, this value is false. authenticate_heartbeats = false # AuthenticateNewWorkConns specifies whether to include authentication token in new work connections sent to frps. By default, this value is false. authenticate_new_work_conns = false # auth token 相当于密码,请注意保护 token = 123qweFrp客户端配置[common] server_addr = frp.abc.com #你的服务器IP或域名 server_port = 7000 token = 123qwe [webhttp] type = tcp local_ip = 127.0.0.1 local_port = 80 #本地端口 remote_port = 808 #服务器端口 [webhttps] type = tcp local_ip = 127.0.0.1 local_port = 443 #本地端口 remote_port = 809 #服务器端口宝塔服务器端Nginx配置 server { listen 80; server_name *.abc.com; # return 301 https://$host$request_uri; #取消此注释可以使80自动跳转443,取消注释时别忘了注释location节点 location / { proxy_pass http://$host:808; #proxy_redirect http://$host/ http://$http_host/; proxy_set_header X-Real-IP $remote_addr; proxy_set_header X-Forwarded-For $proxy_add_x_forwarded_for; proxy_set_header Host $host; resolver 114.114.114.114; } } server { listen 443 ssl http2; server_name *.abc.com; ssl_certificate /www/server/nginx/conf/ssl/fullchain51.pem; ssl_certificate_key /www/server/nginx/conf/ssl/privkey51.pem; location / { proxy_pass https://$host:809; #通过域名访问frp服务 #proxy_redirect https://$host/ https://$http_host/; proxy_ssl_server_name on; proxy_set_header X-Real-IP $remote_addr; proxy_set_header X-Forwarded-For $proxy_add_x_forwarded_for; proxy_set_header X-Forwarded-Proto $scheme; proxy_set_header Host $host; resolver 114.114.114.114; } }宝塔客户端Nginx配置就按宝塔正常流程进行网站的新建和管理就可以,如果使用多域名的话,要在宝塔Nginx服务端先反代相关的域名。特别说明如果此文对你有帮助,请关注留言,转发请标记原文地址,谢谢。
 -
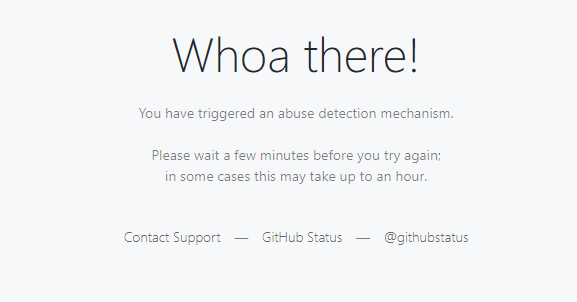
 GitHub 克隆加速 下载加速 镜像加速 推荐 GitHub 镜像域名httpsssh克隆加速zip 加速releases 加速https://doc.fastgit.org✓✓✓✓✓https://github.com.cnpmjs.org✓?✓✗✗https://gitclone.com✓?✓✗✗推荐使用 FastGit为什么推荐使用FastGit呢先这段官网的说明正如您所见, FastGit 仅仅是 GitHub 的代理,所以我们仅需要替换远程地址。大部分的镜像站点为了节约服务资源,而FastGit使用的是代理方式,这种方式的好处就是能保证我们每次下载的源码和GitHub上的一下,而采用镜像方式的可能会下载到昨天的源码或者更早的。FastGit反代列表站源地址缓存github.comhub.fastgit.xyz无raw.githubusercontent.comraw.fastgit.org无github.githubassets.comassets.fastgit.org无customer-stories-feed.github.comcustomer-stories-feed.fastgit.org480 分钟Github Downloaddownload.fastgit.org480 分钟GitHub Archivearchive.fastgit.org无👉 FastGit使用方法FastGit官网推荐使用的方法,可以直接修改 git 的配置,使用 FastGit 替换所有指向 GitHub 的链接:git config --global url."https://hub.fastgit.xyz/".insteadOf "https://github.com/" git config protocol.https.allow always //不执行也可以使用; 这个是从官网搬来的,执行报错,大体意思应该是允许Https,有知道的小伙伴告诉我。取消 FastGit 替换所有指向 GitHub 的链接:git config --global --unset url.https://hub.fastgit.xyz/.insteadof另一种使用方法,关于 FastGit 的使用,本质上与 git 有关。常规的面向 GitHub 的 clone 命令可能如下:git clone https://github.com/author/shell.git使用 FastGit 时,可使用如下命令:git clone https://hub.fastgit.xyz/author/shell.gitwarning 注意当您排查网络错误时别忘了看看 FastGit 是否宕机了,尽管我们提供高达 0% 可用性的 SLA 保障。暂时不支持超过 2GiB 的仓库的 clone,请参阅https://github.com/FastGitORG/nginx-conf/issues/14https://github.com/FastGitORG/nginx-conf/commit/61a41bc0bbb012fc9a6e54b198a10874eeaf9309👉 github.com.cnpmjs.org 使用方法其实开始我是想推荐这个网站的,这个网站也是采用代理的方式,直到真正使用时我遇到了这个 大概的意思是“ 您触发了滥用检测机制 ”,经过我的测试,连续二次访问就能触发滥用检测机制有点太频繁了。使用方法示例git clone https://github.com/author/shell.git使用 github.com.cnpmjs.org 时,可使用如下命令:git clone https://github.com.cnpmjs.org/author/shell.git👉 gitclone.com 使用方法gitclone.com官网gitclone.com 是一个 github.com 缓存加速网站,通过对经常访问的github的代码库的缓存,加速从github的git clone操作。当开发者第一次经 gitclone.com 代理clone项目时,gitclone.com 异步镜像项目,以后有开发者clone该项目时,就会利用上 gitclone.com 的本地镜像,而不是从 github.com 上clone。gitclone.com 会在每天夜间与 github.com 同步。使用方法示例git clone https://github.com/author/shell.git使用 github.com.cnpmjs.org 时,可使用如下命令:git clone https://gitclone.com/github.com/author/shell.git


